A common technique for building an email list is to offer something free to customers in exchange for their contact info. It’s simple and effective. People like reciprocity and don’t mind providing something that is cheap to them in exchange for something they want.
As simple and effective as this strategy is, setting up such a system in WordPress can be a bit difficult. There isn’t an obvious path to a solution.
We find that Gravity Forms is the perfect solution for capturing leads in exchange for free downloads. We recently set up such a system for a client and we found the solution to be elegant and easy to manage.
What You’ll Need
In order to build your lead capture download page, you’ll need the following:
- Gravity Forms
- CMB2
- MailChimp Add-on for Gravity Forms (or your favorite email campaign service)
If you have a developer license for Gravity Forms, there are several email service add-ons included.
Building the Form
To get started, you’ll need to setup a new Gravity Form with the following fields:
- Name (optional)
- Email Address
- Download URL (hidden field)
Ours looks like this:
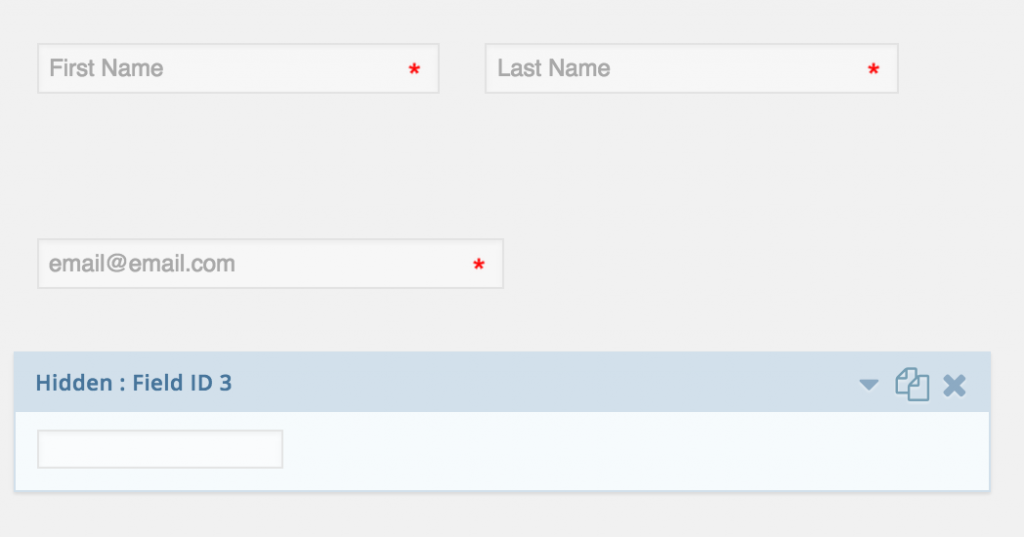
The Download URL hidden field will need extra configuration. Edit the field and go to the Advanced tab. Check the box for “Allow field to be populated dynamically” and enter “download_url” in the Parameter Name box.
Custom Field
We’re using a custom post type for each Download page. This is not a requirement, but in our case it made the most sense.
If you aren’t familiar with Custom Post Types, you can either use a plugin (not the best solution) or add some code to your functions.php. Themergency’s wizard is an excellent way to generate the code. This is our code:
What we want to do is give users a way to upload / set the download for a given page. We use CMB2 to manage this, simply because it makes it so easy. In general these are the steps:
- Install and activate CMB2.
- Add code to your theme’s functions.php file to register a new metabox.
This is the code we used:
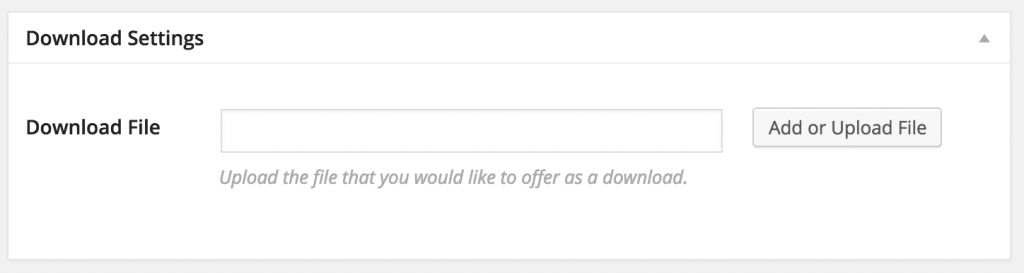
Once you’re done with this, you’ll have a new Custom Post Type “Downloads”, and a nice metabox on each download that allows a file to be assigned:
Putting It Together
Once you have your Gravity Form setup as well as your Custom Post Type and CMB2 Metabox, we need to setup the rest of the process.
This will happen in two places:
- The page template.
- The Gravity Forms confirmation message.
The Page Template
First, let’s look at the page template. Now at this point, I’m going to assume you have a basic knowledge of WordPress templates and the WordPress template hierarchy. If you don’t, it may be a little difficult to figure out these next steps.
Assuming you created a Custom Post Type using our code example above, you will want to create a separate template for single downloads.
This is probably as easy as copying your theme’s page.php or single.php and naming it single-download.php.
If your custom post type has a slug other than download, you’ll need to name it accordingly. If you aren’t using a Custom Post Type, you’ll need to edit the template that corresponds to the post type you are using.
Once you’ve created your template, you will want to edit the template and insert the Gravity Form. The bit of code we added looks like this:
Important: Your Gravity Forms form will have an ID other than 3. Make sure you change the code above to reflect that.
Where you put this code is completely up to you. The key here is that we are adding the form using Gravity Form’s gravity_form function, which allows us to pass in pre-set values for our fields.
What we are doing is setting the download_url hidden field to the download_file custom field for that post, which we are managing with the CMB2 metabox for a good user experience.
When someone views your download page, the form will be prepopulated with a hidden field set to the download URL for that download. Neat, huh?
The Gravity Form Confirmation Message
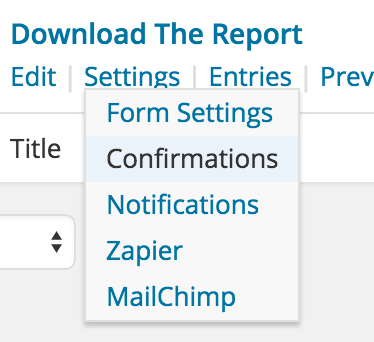
The glue that brings this all together is the confirmation message for your Gravity Forms form. You can edit it by clicking Confirmations under Settings when viewing the your forms:
You can edit the default confirmation message to include any HTML you want, and even insert fields from the form submission into the message. This last bit is the key. We want to insert the URL for the download directly into the confirmation message:
You will want to custom this HTML to suit your purposes. Notice that our link has download right before the closing bracket of the opening tag. This tells HTML5 aware browsers to download the file instead of loading it directly, which is useful when your download is a PDF or image.
What else?
This covers the basics of setting up a lead capture for download pages. What we didn’t cover were the steps required to link your form to your favorite email service. You should follow the instructions for the add-on you use.
Have a question?
Have a question about the process above? Drop us a question in the comments.
I’m not able to get the href to be populated correctly. Can you explain this piece in the Confirmation code?
href=”{Download URL:3}”
Hi Leslie, that’s a Gravity Forms merge field. If it doesn’t work, it’s probably mismatched with the actual field name.
Thanks! I’ve found my mistake. I had made a page template and assigned it to a page rather than making a single post template for the custom post type. Now everything’s working correctly.
awesome tutorial, just the ticket
What if we need this on our homepage? How would we be able to accomplish this without the use of custom post types…
Will following these steps allow different PDFs for different pages without creating new forms for each? For example:
Can I upload a PDF to page A, and have the user fill out the form and be served the corresponding PDF, and also –
Upload a different PDF to page B, and using the same gravity form as page A, have the user served the PDF corresponding to B?
Hi there. Great Idea… but does not work… Everything is fine except the page template…. I created a single-download.php, but when I call the Download-URL of the created download (e.g. http://www.xyz.com/download/my-first-download), I’m redirected to the home page… any idea?
Hey! Thanks for the post, very informative. I have tried a similar solution with CF7, but this appears to be a much more flexible solution. I am currently looking into alternative solutions for multiple downloads. (ie. Allowing the user to submit a lead form only once to allow them to download multiple files— either all at once, where the user can select which files they would like to download within the form and then receive all of the links at once, OR a login type situation where users can create a username/password in order to download which ever file they like on any page within the site)… Any suggestions? I have not found much online yet in regards to this specific solution I am looking for… except for some articles on WP File Manager, which looks clunky and ugly… Your lead capture solution here looks like it could be modified to facilitate multiple downloads at once… but I’m am still too novice at PHP to tell for sure… Thoughts?