It’s no secret: One of the best ways to increase e-mail subscriptions is to offer something valuable in exchange for a reader’s email address.
Many websites use this strategy to great success with thing like case studies, e-books, sample chapters, and other downloads.
Fortunately it’s really easy to create a subscribe to download widget in WordPress using one of the form plugins you probably already have on your site.
The basic concept is this: we want a form that when submitted transmits your email address to your email marketing service and shows the reader a confirmation message with a link to the download.
We’ll break it down for the most popular WordPress form plugins: Gravity Forms.
Why Gravity Forms?
One of the main advantages of using Gravity Form for a subscribe to download widget is the sheer number of integrations they have with popular email marketing services. I count at least 6.
And that excludes Zapier which in theory opens up the possibilities to virtually every platform with an API!
Getting Started with Gravity Forms
Step 1: Create a form.
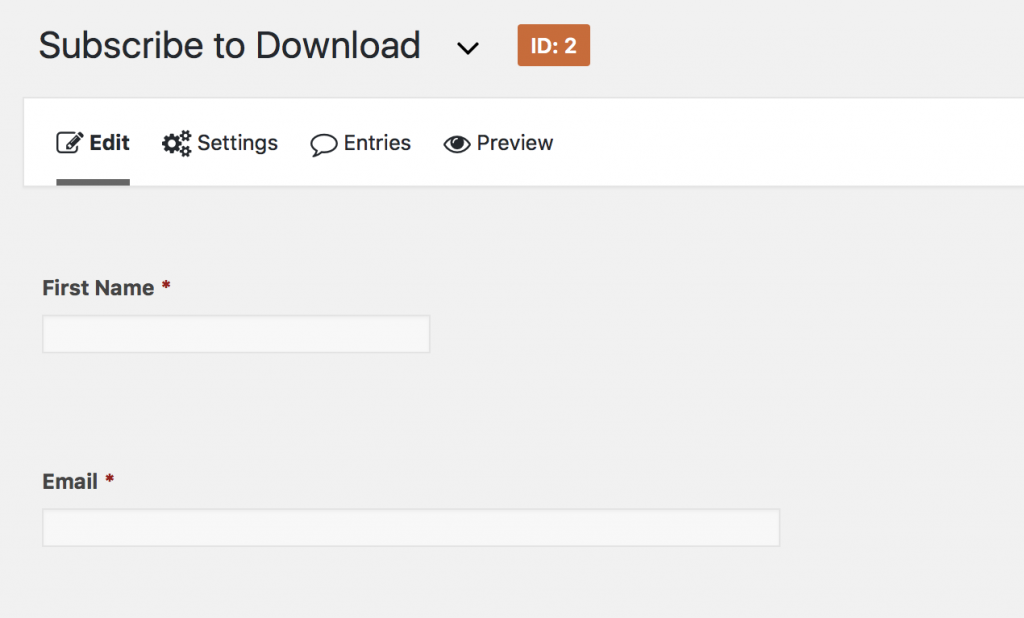
You’ll want to include at a minimum a field for the e-mail address, but a field for first name isn’t a bad idea. It makes marketing easier. For our test form, we’ve added a field for First Name and E-mail address, and made both required.
Step 2: Configure MailChimp
We’re going to use MailChimp for this example, but the process is very similar for others. In our case, we’re going to head to the Form Settings (the Settings button in the screenshot above) and then click MailChimp.
Note: If you do not have Gravity Forms for MailChimp, you’ll need to pick it up here: Gravity Forms MailChimp Add-on
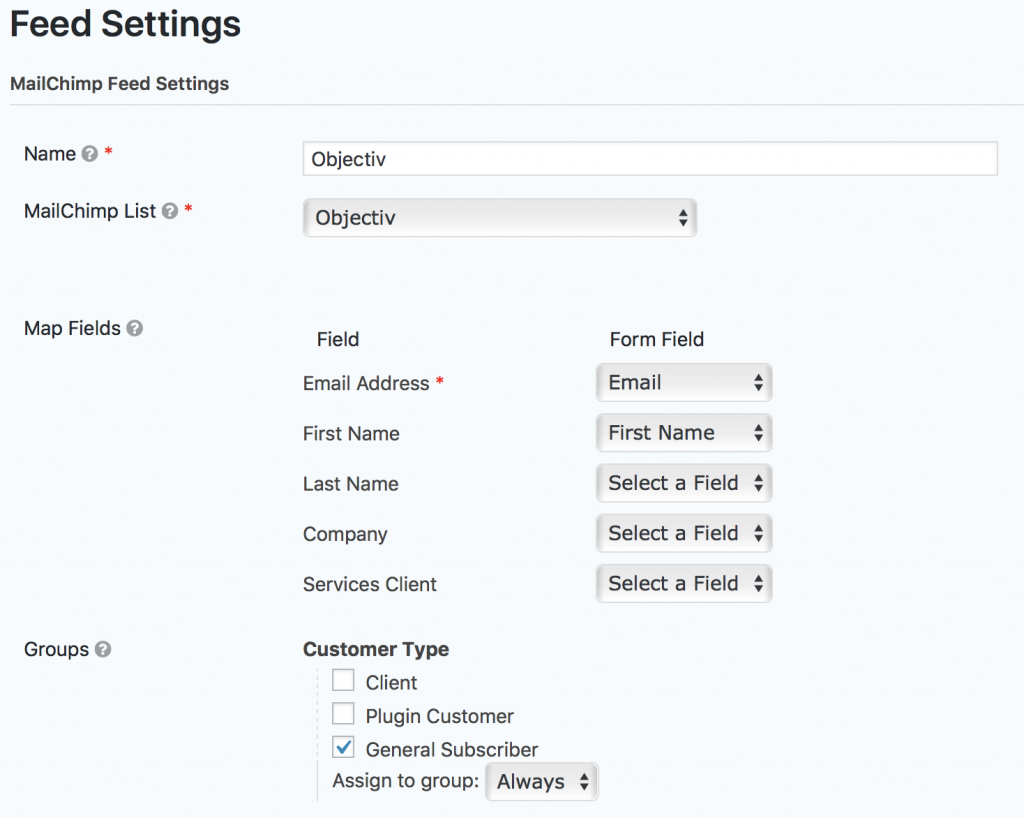
We setup our feed to look like this:
You can see that we mapped E-mail Address to our Email field, and First Name to our First Name field.
We also elected to put new subscribers into our General Subscriber group.
You can also choose to disable Double Opt-in on this screen. This is situational decision, but in general for this type of form I think it’s ok to disable double opt-in as people are explicitly giving their consent and their saved entry records that.
Step 3: Deliver the Download
We can tackle this a few of different ways.
- We can use MailChimp to deliver the download by setting up an automation.
- We can directly provide a link to the download in the confirmation message.
- We can redirect the user to a specific page that links to the download.
1 and 3 probably provide the best experience. 1 and 2 are most secure.
Automations require a paid account with MailChimp, and you’ll need to segment the subscribers so that you don’t send the download to /every/ new subscriber on your list. This is pretty straightforward to setup, and MailChimp support is excellent so we won’t dive deeply here.
So how do we do it if we want to provide the link via a confirmation message or page?
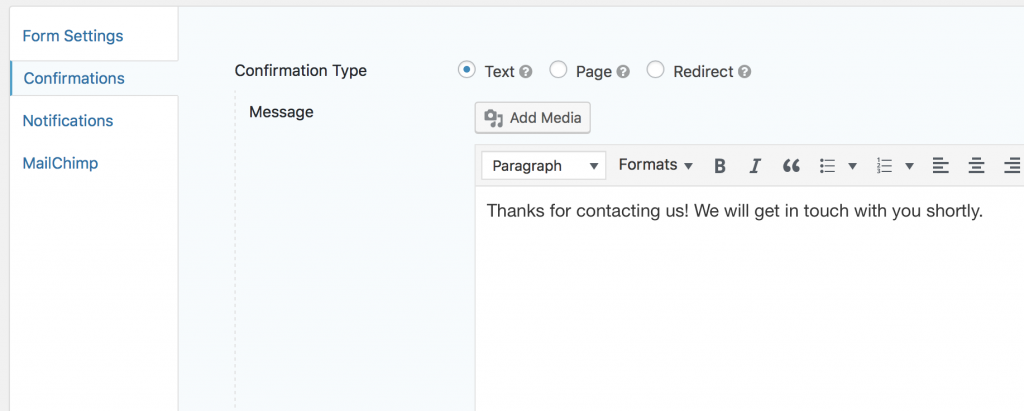
In both cases, we’ll head to Settings -> Confirmations and click to edit the Default Confirmation. It looks like this:
If you want to provide a link in the confirmation, you’re nearly done! Just edit the text to include a link to the download using the WYSIWYG editor and save. Simple, right?
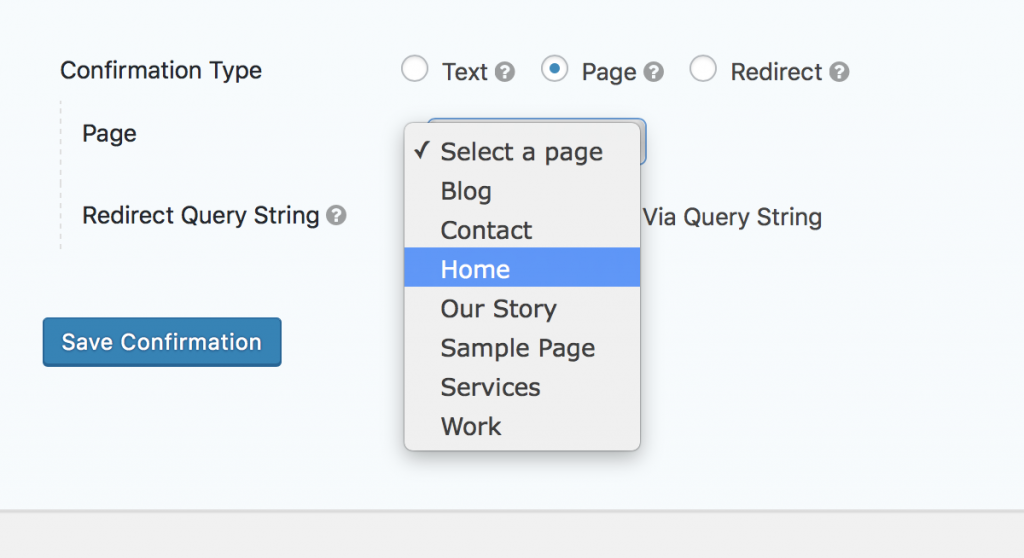
If you want to do a redirect to a page, you would want to first create a new page with the thank you message and download link and then you would select the Page radio button under Confirmation Type above.
You just need to select the page you created from the Page dropdown and save.
(We used Home because we are /lazy/.)
Making it a Widget
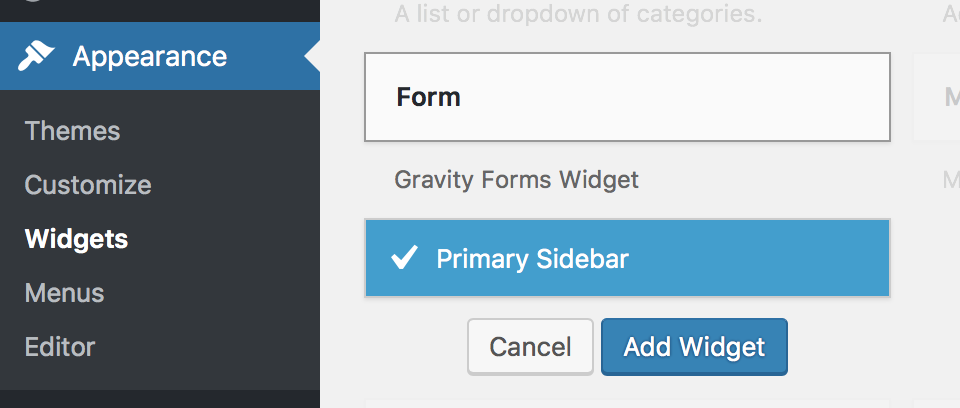
Once your form is configured, you simply need to head to Appearance -> Widgets and add the “Form” widget to your sidebar:
And that’s it! Anyone who fills out the form will be placed into MailChimp and receive the requested download.
